Friday, 25 May 2012

Work of art

Very close to finishing now. Ecky Thump is in dry dock, the bottom is already blacked and the chunky 24" x 22" Crowther prop fitted. Although this will load the JP2 nicely, I would have preferred a larger diameter with lesser pitch, but the modest draught Steve now builds his boats to,  with good reason given the lack of dredging on many canals,  precludes such.

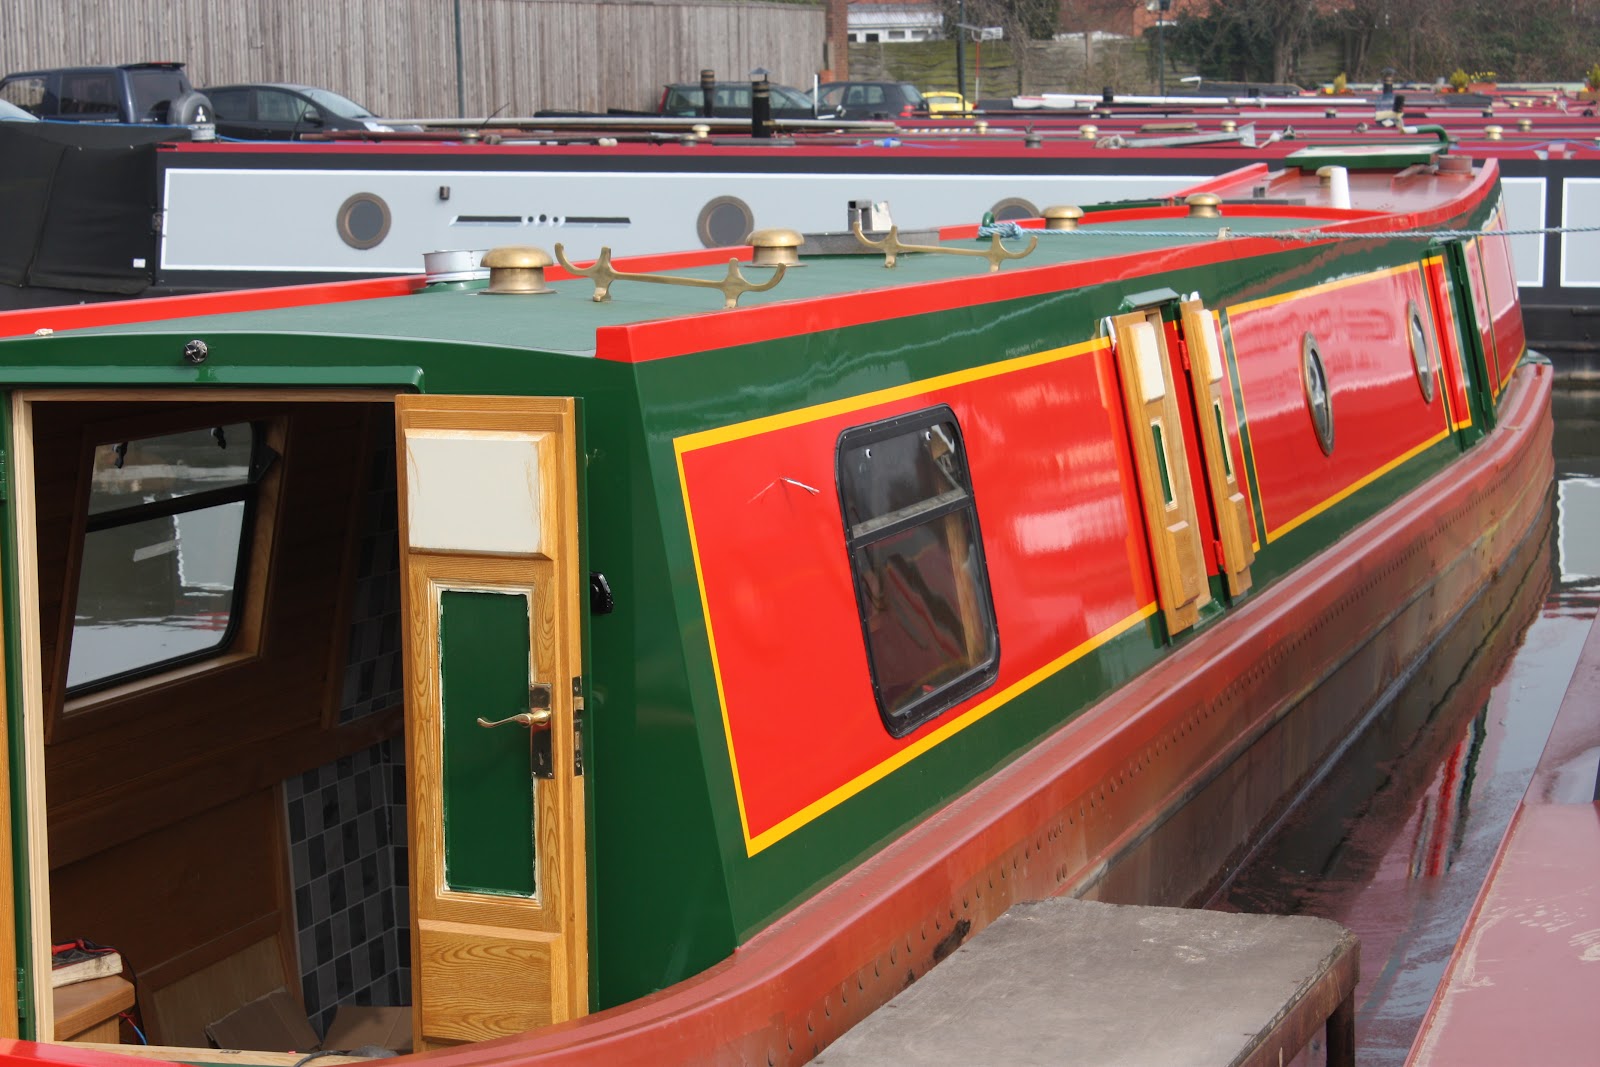
A stationary boat in the covered area of the dock lends itself to having the external artwork and signwriting added as well. Not surprising then meeting Kevin, a thoroughly nice chap that Steve employs to do this skilled work. Born in the same year as myself, Kevin is very much old school with forty years experience, and it shows.

My take on an Old Thumper beer bottle label celebrating the engine and painted between the cabin portholes, is left until last, but as can be seen the majority of the work is already done and will be completed early next week.  Inside roses and castles already adorn every spare space, on the inside of exterior doors, cupboard doors and BMC table. In the picture of the rear doors, you can just make out on the right a slot above the interior decoration for the marine VHF radio. Above that are the bowthruster controls.

Given the time constraints, whilst Kevin weaves his magic outside, work continuous at a frenetic rate inside.

The engine installation is near completion although time hasn't allowed the alternator mounts to be tackled yet. Nevertheless I was told the engine had started first time the day before once a bit of red diesel was bled through. It was a proud moment when Tony gave me a quick demo. Hardly a half turn of the flywheel before it fired and settled into a steady slow thump. Almost an anti-climax, it was though it had been there ever since it was built nearly eighty years ago. If they still made threepenny bits, I swear one would have balanced on the rocker covers such was the smoothness. Note the neat oil tank installation mounted on a custom bracket, exactly as I had hoped, allowing easy draining with access to the underfloor area below.

Whilst there is no engine charging yet, the fruits of of Tony's continued work on the electrics are a complete working bow thruster installation. Two batteries located in the forward part of the starboard well deck locker power the Nobels 9 hp unit. As usual the cabling hooking it up via isolators, fuses and shunts is to Tony's high standards.

Both stoves are now installed and in the bathroom the quadrant shower, loo and finally the vanity basin tap are fitted. Still awaiting a matt black towel rail, but that is work in progress.
At 24 inches this is the largest prop that can be fitted comfortably between uxter plate and rudder stay. Note long swims, a Hudson trademark.


As Steve was having trouble obtaining an appropriate gas solenoid valve, with more time on my hands I managed to source a "CE" approved one with the ½" BSP fittings to accommodate the piping demanded by the BSS examiner. This will allow me to remotely turn off the gas supply in the bow locker, failing to off, prevention being better than cure.

A small re-think on the service battery circuits adds a substantial 600 amp BEP isolator for all the devices that need access to the batteries even when unattended.  I also won't have to worry the chargers and alternators have a load whilst functioning since this will be normally left on. The original smaller BEP isolator will now control the feeds to the main distribution panel. This allows complete isolation when needed to attend the batteries themselves. Since this will involve replacing the existing isolator with  the larger one then finding a new space for the former with attendant cable changes, Tony nodded politely to my request with a sigh - whoops!

As alluded to in previous postings, there is a prior commitment requiring  Ecky Thump to be positioned elsewhere for a few days. Remaining work is essentially the alternator and the Mikuni diesel heater installations, plus heating hook-up to the engine. Although this will require a further two weeks work, she will at least look complete by early next week and be able to make the appointment under her own steam. It will also provide an excellent opportunity for snagging any last minute issues.


I can now reveal that Ecky Thump attended the four day Crick boat show as one of S M Hudson's three exhibits. The 52 mile 28 lock journey was made in just two days without issue. I was lucky enough to assist in the return journey also made in two long days. A very instructional exercise despite the miserable weather on the second day. The engine sounds fantastic and the boat steers well, although I'm definitely in need of close quarters handling experience. The 11 inch Francis searchlight performed well illuminating tunnel sides superbly as the beam was flooded, especially the infamous 1800 metre Braunston one.

Completion and handover will be within three weeks to allow for some minor snagging. There will also be another visit to the dry dock for a second coat of blacking and touch up of minor scrapes received during its trip to Crick and back, one of which was attributable to me - whoops!

Friday, 4 May 2012

Get the motor running

Well it seems the majority of the AC and DC electrics are installed and working, batteries charging, AC available via battery or shore power and we now have lighting throughout the boat - yipee! Focus has now switched to the engine installation, the two main areas being mechanical and electrical. Tony has already hooked up the engine start panel and installing the alternators will be next.

Various dark green painted tanks matching the engine, are looking pretty mounted on the shiny engine room bulkhead and will look better still with a few judiciously placed Lister decals. Most of the plumbing to/from them in shiny copper is completed, and its now possible to draw fuel from main to day fuel tank (top of picture) using that nice big waggle from side to side hand pump. Not sure how long the plastic sight tube will remain visible but there is a vent/overflow back to the main tank, so no harm can come from over enthusiastic pumping. The feed from this tank to the engine will be via an additional fuel filter with Lexan see-through bowl. Mounted on the side of the cupboard are the header tanks for central heating and engine below, the latter being already plumbed in. Sitting very comfortably between all these is the huge oil pressure gauge, with unions added to feed the smaller one on the roof for the benefit of the steerer.

The various connections to the main fuel tank including draw and return pipes to/from day tank, spill rail return from engine and feed to Mikuni diesel boiler which is still to be fitted. The fuel tank level sensor can also be seen. To the rear the horizontal calorifier is in place just awaiting plumbing.

On the engine panel, turning the key and pressing the big red start button produces a satisfying churning noise from below and an enthusiastic leap of that huge flywheel.


Much head scratching has been given to shoehorning the two alternators into the rapidly diminishing space in the engine room. A ladder shaped mount to sit sideways astride the flywheel, has been sturdily fabricated from 6mm steel to take the larger 140 amp one on the lower step, with the smaller immediately above. I say smaller but noted it has grown to a 90 amp unit, although not complaining. It may be pushing the envelope to expect this to be driven by a single belt, but as Steve provides positive belt adjustment, there won't be a belt tension issue.

Placement of the ladder mount firmly bolted to the engine bearers will also help protect passers by from the spinning flywheel, as well as providing easy access and simple removal of both alternators to allow work on the engine.
Most of the switch panel is now connected and installed in the upper cupboard with remote control panel for the Combi above and an immersion heater switch below. The service battery monitor is working as are both tank gauges, but still awaiting the bowthruster batteries so no indication from that monitor yet. They will be remotely and automatically isolated via a cunning relay operated motorised isolator which mimics the service battery one. In the lower cupboard keeping the AC and DC systems essentially separate, is the neatly installed small consumer unit for AC distribution and circuit protection. A multi-colour LED shore power polarity indicator has been fitted within it on the left. Galvanic isolator connections can be seen at the top.


Proving that Tony isn't just an electrics wizard, he was fitting the traditional push/pull control linkage to the hydraulic gearbox whilst I was there.

The Spinflo gas hob has been fitted and another of Steve's workforce was preparing the matching oven/grill for installation, whilst seemingly seconds later fitting the stern nav light in the continuous drizzle. Water pump with inlet filter and pressure accumulator have also been fitted, sitting immediately in front of the water tank, with easy access from behind the cabin steps.

Despite this activity there is still an awful lot of work to complete not least the sign writing. On first impression then during this visit, I was doubtful the boat would be able to move under its own steam before the end of this month. However I'm assured it will although final details like the bowthruster itself and the diesel heater installation may come later. In fairness many missing bits are already pre-fabricated and will be fitted soon with little further effort. Can't wait for next visit in about three weeks.

Friday, 13 April 2012

Electrickery

The electrical installation is now well underway. Living on a boat for twelve years has given me a clear idea of what I need in this area and what works, for me at least. Consequently this electrical fit is well above the one Steve normally provides.

Tony has been busy in the engine room. The service battery box to take five 110 amp hour batteries has been constructed and located to the rear of the engine room. To the front woodwork has been added to support the Combi charger/inverter, a second battery charger, isolators, fuses and shunts. All neatly concealed in the well vented underfloor area, although the Combi will have a remote control sited above the main switch panel.

The engine start battery will be located the other side of the engine room adjacent to the Mikuni diesel water heater. Final decisions have been made on the location of AC and DC electrical outlets, with back boxes being fitted during my latest visit. Where possible, dedicated AC outlets and TV aerial sockets have been hidden in cupboards with just general utility outlets visible using flat Vantage faceplates for sockets and light switches.


All Tony has to do now is wire according to this diagram.
Easily said I know, and this just covers the main wiring features, not the routine cable feeds. I had intended to install the electrics myself but this proved impractical. If Tony's previous work is to be judged though I won't be disappointed.


He has already made a start as this wiring mayhem shows. Hope he's not colour blind. It will all be hooked up to this panel

The control panel for the horn, tunnel and navigation lights has been neatly installed under the ticket draw. The Francis searchlight and Klaxon horn will be relay operated, taking power from the nearby bowthruster batteries. On the opposite side of the rear doors, the bowthruster control panel and marine VHF transceiver will be fitted for easy access from the steering position.


Although the covers for the well deck lockers have been added, little other work has been completed since my last visit. I'm told we are still on track to have a boat that will move under its own steam and look finished before the end of May though.

Next visit will hopefully show the engine installation well under way if not actually running. Then there is a visit to the dry dock to be scheduled for blacking plus fitment of the prop and bowthruster. The artwork, sign writing and detail paintwork will also be completed at this time.

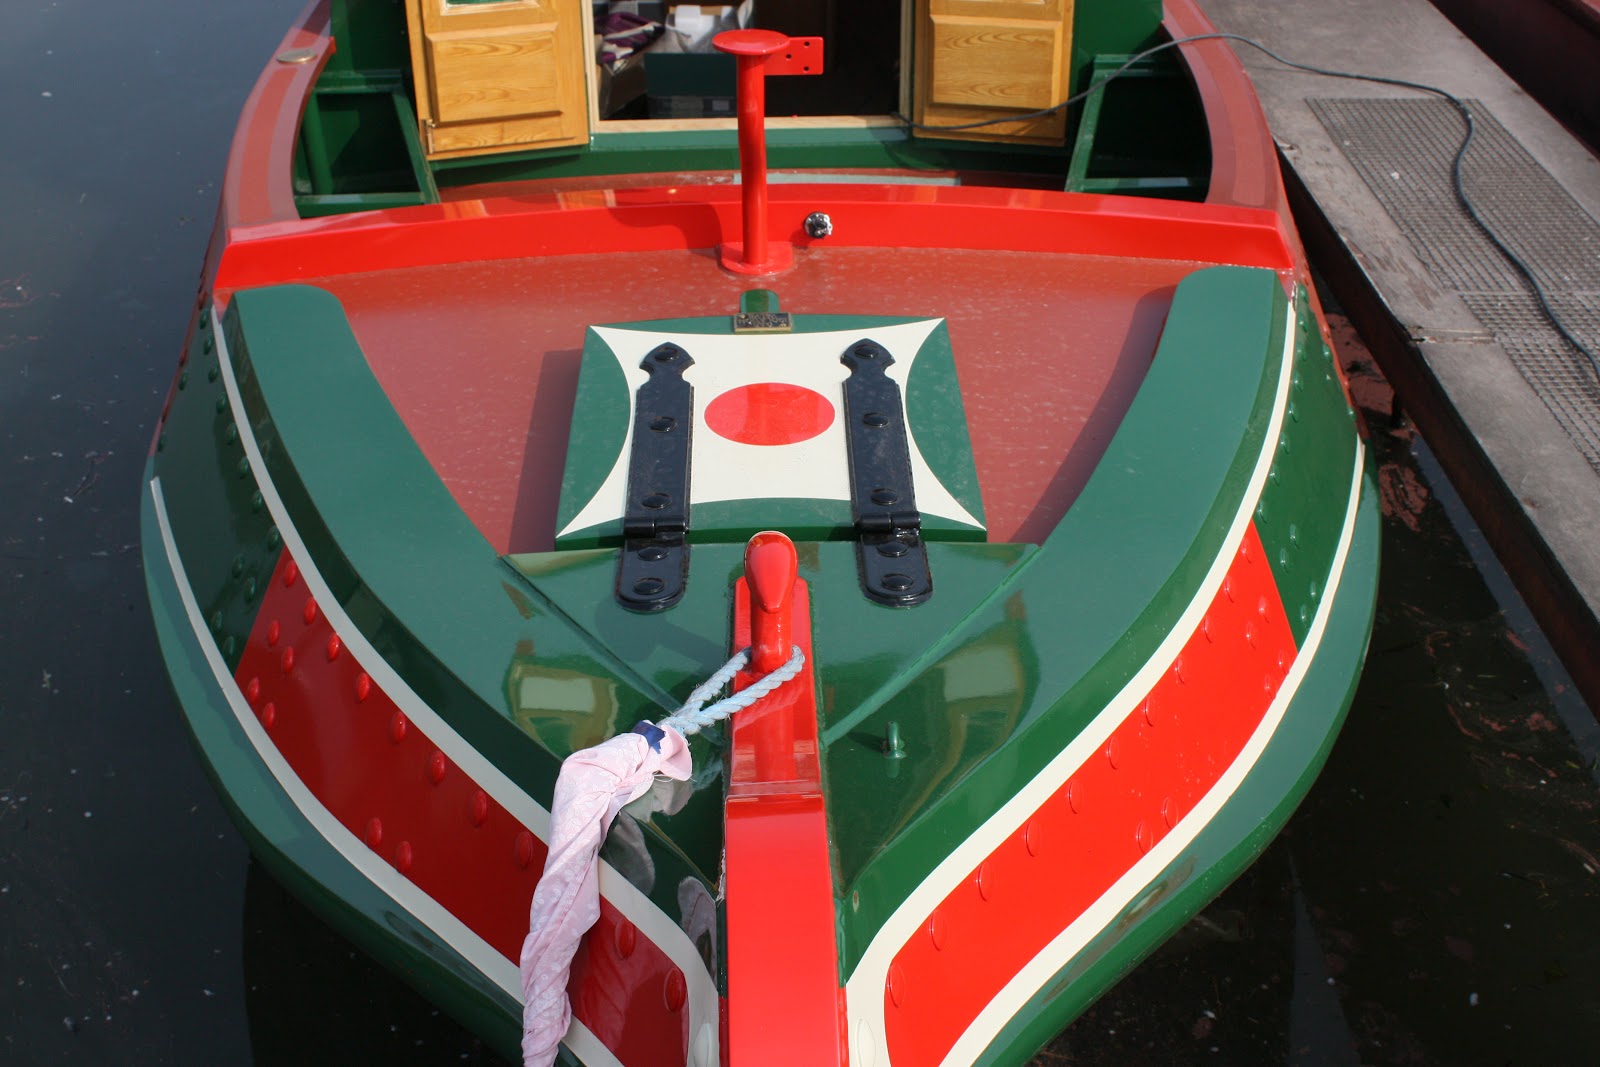
Couldn't resist adding a couple of external photo's, one of the bow showing the sharp pinch at the water line and also the stern showing off the paintwork in the sunlight.

Steve took the arrival of several of my family in his stride, as we had arranged to meet at his yard for a nearby family commitment later that day. It did give them an opportunity for a sneak preview though.

Saturday, 24 March 2012

Home stretch

Finally get the chance to see the new paintwork in daylight. Windows and portholes are back in, hatches replaced plus a few extra bits of brassware. The painted pigeon boxes were also spied in one of Steve's storage containers awaiting fitment.

Work can now start in earnest adding fittings such as the diesel water heater, calorifier, stoves, loo and kitchen appliances as the home stretch approaches. Then there are the boat electrics to be hooked up. Five service batteries plus a starter one in the engine room and a further two in the starboard well deck locker for the bow thruster. The DC switch panels have already been built and will include a visible engine start panel and a helm panel by the rear doors as well as the main control panel which will be hidden behind decorated doors in the tall engine room cupboard.

There will also be considerable work hooking up the engine life support systems as well as two alternators. Four tanks need to be accommodated in the engine room. Central heating and engine cooling header tanks, engine oil tank and the gravity feed fuel tank filled by hand pump from the integral main one below. I understand most of this work will be completed last though.


Although I was expecting to discuss the electrical installation at a later date, Martin, Steve's second in command seemed keen to get it sorted now. To this end Tony the electrician had been busy retrieving all the electrical goodies I had dropped off over previous months and laying them out all over the boat. Over two hours were spent with the two of them identifying the components, discussing their layout and how they related to my AC and DC wiring diagrams. Although a few we don't normally do it that way comments were made, it was generally agreed that the electrical installation could be completed to my requirements.


Pleased to see the tile grouting has now been completed, with the mosaics in the bathroom particularly eye catching against the bumpy white tiles.


Glossy BMC and rear of engine room as paintwork preparation continues.

Neat plumbing below galley sink.

Friday, 9 March 2012

Technicolour tease

Still not quite out of the paint shop and consequently no further work on the interior. Seems the cold snap created staff sickness despite burning huge quantities of propane keeping the place warm, and adding to the delay. Should be out in a day or so though and worth the wait as these pictures attest, although the colours may be a little different in daylight.


Hatch covers awaiting re-fitting. The one in the foreground is the sliding hatch for the rear cabin.
Trade mark Hudson casting for the rudder stock boss. Rear plate is to mount the stern nav light.


Whilst I was taking photo's the brass pole racks were added and mushroom vents replaced. The paint on the BMC, engine room roof and gunwales is a silk finish to emulate the traditional red oxide. A non-slip surface is added on the gunwales and the green forward part of the roof.

Whilst I was yet again disappointed at the slow progress made, I do have a firm completion date now of the 25th May. Not at liberty to explain any more at this stage, but consoling myself with the fact that I will have the use of the boat during the warmest part of this year.

As I had some time to kill before my train journey, Steve kindly offered me his personal 37 foot tug for a chug up the cut. A brave man I think as this was my first solo trip on a canal, and a narrow one at that. An enjoyable experience but after being spoilt by the wheel steering on my yacht, will need to build up the arm muscles.


Will be visiting more regularly now as I expect the pace of work to creep up again, with discussions needed for the the final fittings particularly the electrics. Hopefully better pictures next time to include the interior nearing completion.

Saturday, 28 January 2012

Paint it red

The boat is already in the paint shop. It seems the previous job finished earlier than expected, so no time was wasted getting Ecky Thump in. Unfortunately this limits my access to the boat I'm told. External fittings are stripped out, with flatting and initial masking nearly completed. A week of dusty work. Don't envy these guys.


Colours have been mulled over, changed, advice taken, samples provided, but we finally have something approaching the original red, green and yellow used on post 1921 Fellows, Morton and Clayton working boats. I say approaching because despite all the research no one seems to know for sure, so am taking an average of opinions commensurate with what pleases me. Having compared my choices with a multitude of restored working boat photo's, Traffic Red , Mid Brunswick Green and Golden Yellow have won the day. The green should be a good match to the Lister green in the engine room. A creamy white will be used for the traditional upper band on the stern and to outline the detail paintwork on the top bend. Paint layout for the cabin sides at least, can be seen in the blog title.

Given the boats early visit to the paint shop I may have delayed my monthly visit, but the train tickets had already been booked. Promising to be on my best behavior and tread carefully, I persuaded Steve to let me have a peek inside.

Tiling in the galley is complete bar grouting and looks great especially now the sink and mixer tap are in place. Pity this area is still in disarray, but not for much longer hopefully.

Tiling in the bathroom is also complete with vanity basin fitted, but awaiting the matt black mixer tap. This rather expensive must have is causing some minor concern as they can't get it apart to tighten connections.
This shower is going to look superb when finished.


The scumbling in the BMC is also complete with the engine room nearly so, and presently being worked on.
Radiators have been installed in the saloon and bedroom and although difficult to see, I suspect a fair amount of plumbing has been completed. I also noted second fit wiring had been started and all light switch box's installed.

Obviously all welding needs to be completed before painting, so I was pleased to see the late addition answer pins had been provided. Also noted was the provision of exhaust flange in the engine room roof panel. 

As I had brought it with me, Steve confirmed the design and positioning of the horn bracket so welding could be completed later that day.


Also discussed was the number and type of electrical fascia's for AC outlets and light switches etc. Vantage Flatplate flush fittings will be used in brushed stainless with black inserts, so a trip to CEF is planned.

Next visit is scheduled for February 28th when it should have emerged resplendent from the paint shop - can't wait. Still a long way to go though so finish date will probably be in May now.